How to Take Apart Cubicle Walls: 2026 Step-by-Step Guide
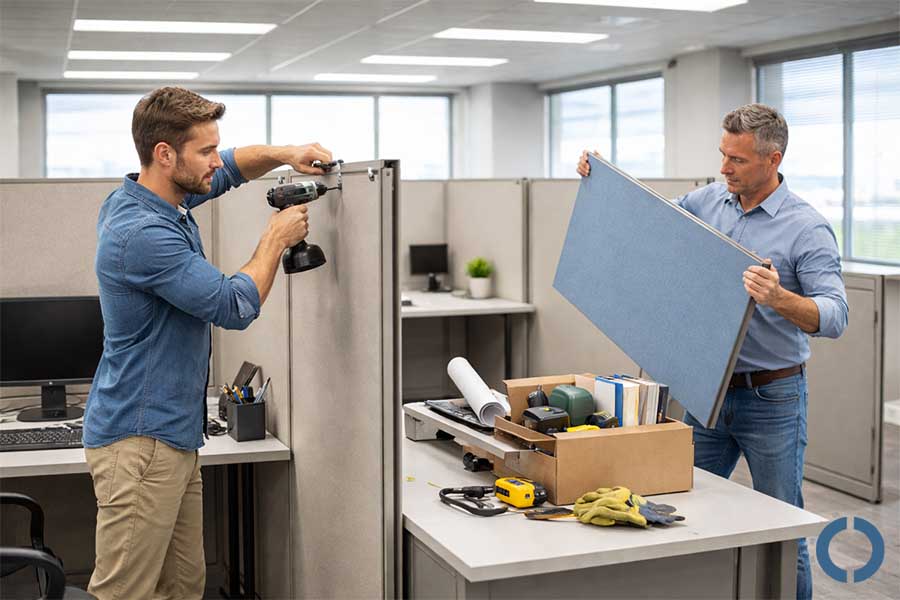
You may be planning to change the layout of your office space or moving, and are wondering how to properly take apart cubicle walls without damage.
In most cases, you can do it yourself as long as you know the correct steps and follow safety precautions.
Most office partitions today are modular in design and are built to be disassembled, moved, and reinstalled.
Now the question is: How to take apart cubicle walls?
To take apart cubicle walls, first clear the area, then unscrew or unclip all connectors, lift panels carefully one by one, and store the hardware for future use.
Knowing the correct way to open partition walls can save time, money, and potential hassle.
Doing this incorrectly may cause damage to the panels, damage to the electrical wiring, or even safety hazards.
If you’re planning to do it yourself, Collaborative Office Interiors, the best office furniture supplier in Houston, has tried to make the process of separating office partitions simple and feasible for you by providing a comprehensive, step-by-step guide.
Below, you will learn what tools you need, the exact steps for removing partitions, what mistakes you should avoid, and when it’s best to seek professional help.
You Might Also Enjoy: Which Home Office Furniture Sets Are Best for Productivity?
Safety First – Before You Start
Before you enter the process of taking apart cubicle walls, the first and most important thing to consider is always safety.
- The importance of power outages and safety: The first important step for safety is to turn off the power.
If the cubicles have electrical systems such as cables or electrical outlets, you must disconnect the power before starting work.
- Use gloves and hand and eye protection: There is a risk of injury to hands and eyes when disassembling cubicle walls and working with various tools.
That’s why it’s essential to wear safety gloves to prevent cuts, scrapes, or serious injuries.
Also, be sure to wear safety glasses to protect your eyes.
- Compliance with OSHA safety standards: Finally, you should pay attention to workplace safety standards.
The Occupational Safety and Health Administration (OSHA) has established rules for workplace safety, in which work with certain equipment and tools must be carried out in accordance with safety standards.
These standards include using personal protective equipment, maintaining safe distances, and working in safe conditions.
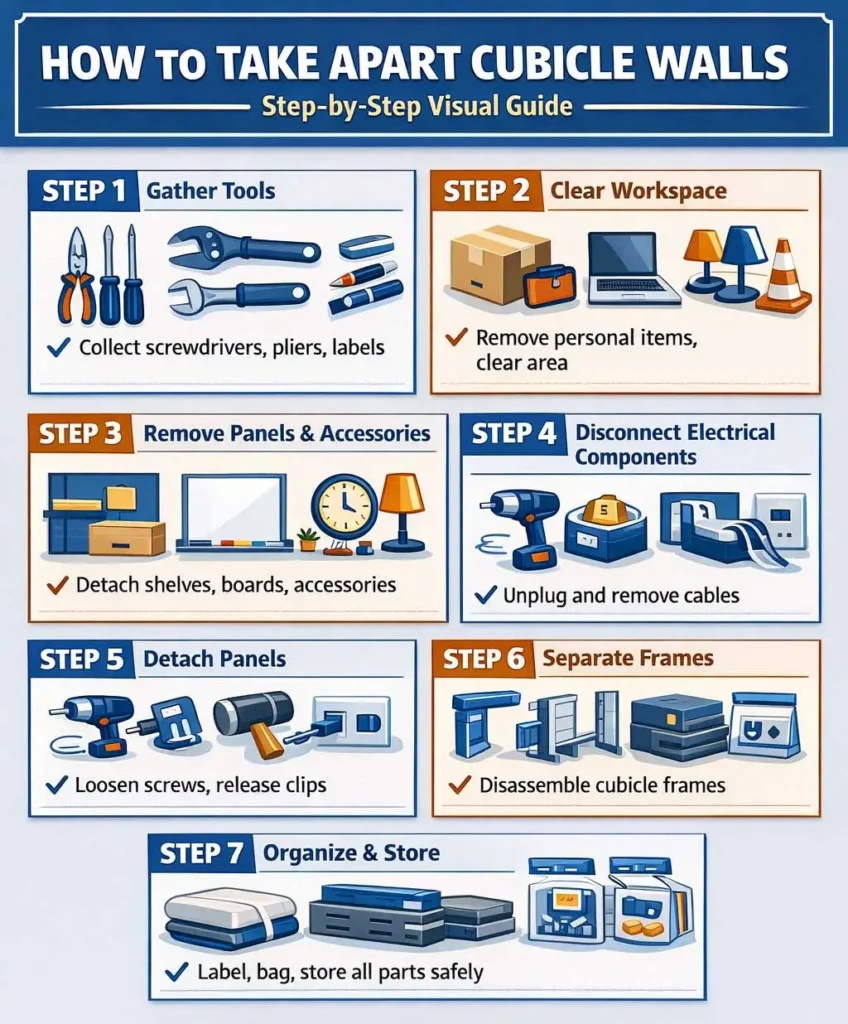
How to Take Apart Cubicle Walls Step-by-Step
Step 1: Gather Required Tools and Materials
- Screwdrivers – Phillips and Flathead: These screwdrivers are one of the most essential tools for disassembling cubicle walls.
You will use screwdrivers to unscrew various screws on the cubicle walls.
- Pliers: Used to grasp and remove connections that cannot be easily opened by hand.
They are also used for pulling or squeezing small, hard parts.
- Allen Wrench: This tool is designed to loosen screws that are in special or inaccessible places.
- Rubber Mallet: This mallet is used to strike pieces and safely separate panels.
Unlike a metal mallet, a rubber mallet applies less pressure to surfaces and prevents damage to parts.
- Labels and Markers: Labels and markers are important tools for storing and classifying parts.
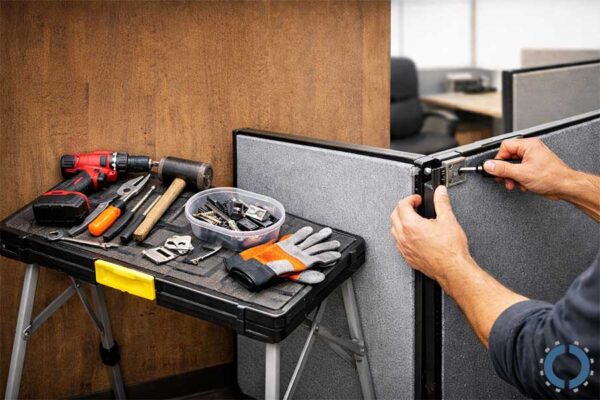 When removing each piece from the cubicle walls, label them so that you can easily connect the pieces together when reassembling.
This not only helps with reconstruction but also prevents confusion during handling or transportation.
How to take apart cubicle walls without screws?
Many modern office cubicles use clip or lock systems, which minimize the need for complicated tools.
In these models, you can usually release the clips or locks and remove the panel by gently pushing, pulling, or shaking it.
At this point, having a user manual is very useful, as it will identify the exact location of the locks and the correct way to open them, preventing damage to the components.
Step 2: Clear the Workspace
At this step, you should clear the area inside and around the cubicles and remove any obstacles and excess debris.
To do this, you need to remove all personal belongings, office supplies, and electronic equipment from tables and shelves.
This reduces risks and damage and also reduces the time required for disassembly.
This will make your space ready and safe for the next step.
You Might Also Enjoy: Which Brands Offer the Best Modular Dividers for Quiet Offices?
Step 3: Remove Panels and Accessories
At this step of taking apart cubicle walls, you should remove any accessories such as partition shelves, filing cabinets, whiteboards, or installed organizers.
If you’re not sure how to remove cubicle shelves, look for the clips, screws, or brackets that hold them in place.
- Removing shelves and accessories: Carefully and cautiously remove these accessories to avoid damaging them.
To start, loosen the screws and brackets attached to the shelf or whiteboard, and then gently remove them from the cubicle wall.
- Whiteboards and writing boards: If a whiteboard or board is mounted on the partition, use a screwdriver to pry it open.
- Other accessories: Remove other accessories such as clocks, vases, reading lamps, or anything else attached to the cubicle wall.
- Label parts: If you plan to keep these accessories for reuse or reassembly, be sure to label them.
- Organize and sort disassembled parts: Place all accessories and parts neatly in separate boxes or compartments to prevent them from getting lost or damaged during the process.
Step 4: Disconnect Electrical Components
Before taking apart cubicle walls, the first thing you should do is turn off the power source.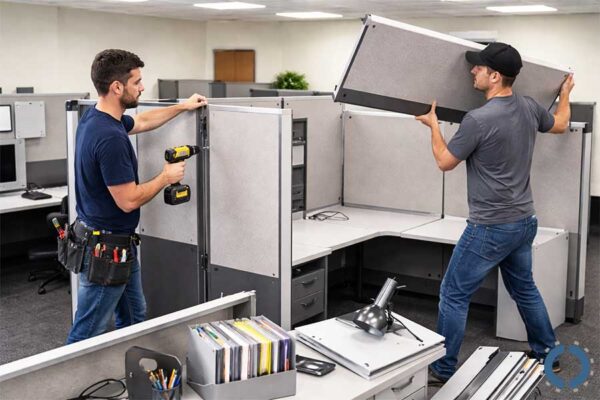
Then, at this stage, electrical components such as cables, outlets, and electrical appliances that are connected to the partition must be carefully disconnected.
Wires and cables connected to cable routing or cable management systems should be carefully separated from partition walls.
If electrical outlets or network sockets are attached to the partition, you should remove them from the wall and, if necessary, open them with a suitable screwdriver or wrench.
If you are unsure about how to disconnect electrical connections, it is best to seek help from a qualified electrician.
Finally, label all parts to make it easier to reassemble cables and electrical equipment.
Step 5: Detach Panels
Office cubicle walls, whether traditional or modern, are usually made up of interlocking panels that are secured in place with connectors or screws.
- Loosen the screws and fittings: Using a screwdriver or Allen wrench, loosen the screws and panel connections.
This will allow the panels to separate from the frame gently.
- Using clips in clip systems: If your system uses clips, release them with gentle pressure.
Be careful that excessive pressure may cause the panel or clips to break.
- Use a rubber mallet: If the panels are too tightly in place, you can gently tap them with a rubber mallet to make them easier to remove.
Depending on the type of system, gently remove the panels and place them in a safe and tidy place so that they are not damaged during subsequent assembly or moving steps.
You Might Also Enjoy: How Much Does It Cost to Furnish a Medical Office?
 Step 6: Separate the Frames
After removing the panels, it’s time to open the cubicle frame.
Frames consist of vertical supports and base pieces, usually connected together with screws or brackets.
- Gently remove the parts: Carefully open each part of the frame and avoid applying too much pressure to avoid damaging the parts.
- Identify and sort parts: After removing each part, place them neatly in a safe place.
- Protect parts: If the frames have small connectors or screws, place them in a separate bag or box to prevent them from getting lost and allow for easy reassembly.
Step 7: Organize and Store Components
At this stage of removing the cubicle walls, store the panels, frames, and accessories in a safe and suitable location.
You can use a blanket, padding, or protective cover to protect them during transportation or long-term storage.
- Small parts storage: Place all screws, brackets, and smaller parts in separate, labeled bags so none get lost.
- Arranging large pieces: Stack panels and frames neatly, making sure there is no extra pressure on them to prevent damage.
Some offices may require additional steps for isolation due to specific layout or furniture type.
However, these seven general steps are a comprehensive guide to DIY cubicle wall removal that usually doesn’t require professional help.
Common Challenges and Solutions
You may encounter some problems when disassembling cubicle walls.
Below, we will address the most common challenges and practical solutions to how to take apart cubicle walls.
- Stuck panels: Sometimes, panels are not easily removed due to tight placement or a rigid clip system.
Solution: Use a rubber mallet and gentle taps to release the panels.
If the system is bolted, make sure all bolts are loosened.
- Lost fasteners: Store screws and small parts in labeled containers so you don’t lose them.
- Cables embedded in walls: In some office cubicles, power or data cables are located inside the walls, which can be damaged when removing the panels.
The solution is to first turn off the power, then carefully move the cables out of the way.
Tips for Efficient and Safe Cubicle Disassembly
Following a few simple but important tips can make the process of removing office cubicle walls faster, safer, and hassle-free.
These recommendations are for those who want to do the job both DIY and professionally.
1. Take Teamwork Seriously
Taking apart cubicle walls and frames, especially large and heavy pieces, can be dangerous on your own.
Working with at least one other person will give you better control over the pieces and reduce the chance of damaging or falling panels.
2. Pay Special Attention to Labeling
Label any removed panels, frames, cables, or parts.
This prevents confusion during reassembly or relocation and significantly reduces installation time.
3. Secure Storage of Parts
Place large pieces on a flat, safe surface and use blankets, foam, or padding to protect them.
Store screws and small parts in special bags and labels so they don’t get lost.
4. Use a Manual or Photo Before Disassembling
If an office cubicle manual is available, be sure to check it out.
Otherwise, take pictures of the cubicle panels and frame before you start.
You Might Also Enjoy: Pros and Cons of Open Office Plans: 2026 Review
When to Hire a Professional
Although many office cubicles can be removed DIY, in some situations it is better to seek professional help to avoid potential damage and additional costs.
- Fully wired cubicle systems: If the cubicles have internal wiring, electrical outlets, a network, or data cables, removing them without specialized knowledge can be dangerous.
- Custom or heavy partitions: Partitions that are custom-designed or have a high weight usually have a more complex structure.
- cubicles that require professional reinstallation: If you are planning to reinstall partitions in a new space and precision in alignment, safety, and final aesthetics are important, using a professional can greatly improve the end result.
Conclusion
In this How to Take Apart Cubicle Walls Guide, we saw that removing office cubicle walls, if done step-by-step and in a systematic manner, can be a simple, safe, and cost-effective DIY process.
Many people face this challenge when changing their office layout, moving, or renovating their space, and often don’t know where to start or what tips to follow.
During this process, safety should always be a priority.
Labeling parts, proper storage, and attention to detail not only prevent damage to equipment but also save time and money during reinstallation or relocation.
We wrote this article intending to directly answer users’ questions, reduce common errors, increase safety, and save time and money.
Collaborative Office Interiors offers comprehensive office furniture solutions with a focus on efficiency and cost-effectiveness.
From modern office furniture to the installation of new and used office cubicles and partitions in Houston, this collection meets the diverse needs of offices.

John Ofield is the owner of Collaborative Office Interiors. Houston’s trusted source for modern and commercial office furniture, office cubicles, demountable walls, office desks and tables, and complete workspace solutions. With more than 40 years of experience, he combines deep product knowledge with hands-on space-planning expertise to create ergonomic, productivity-focused work environments for businesses across Southeast Texas.
